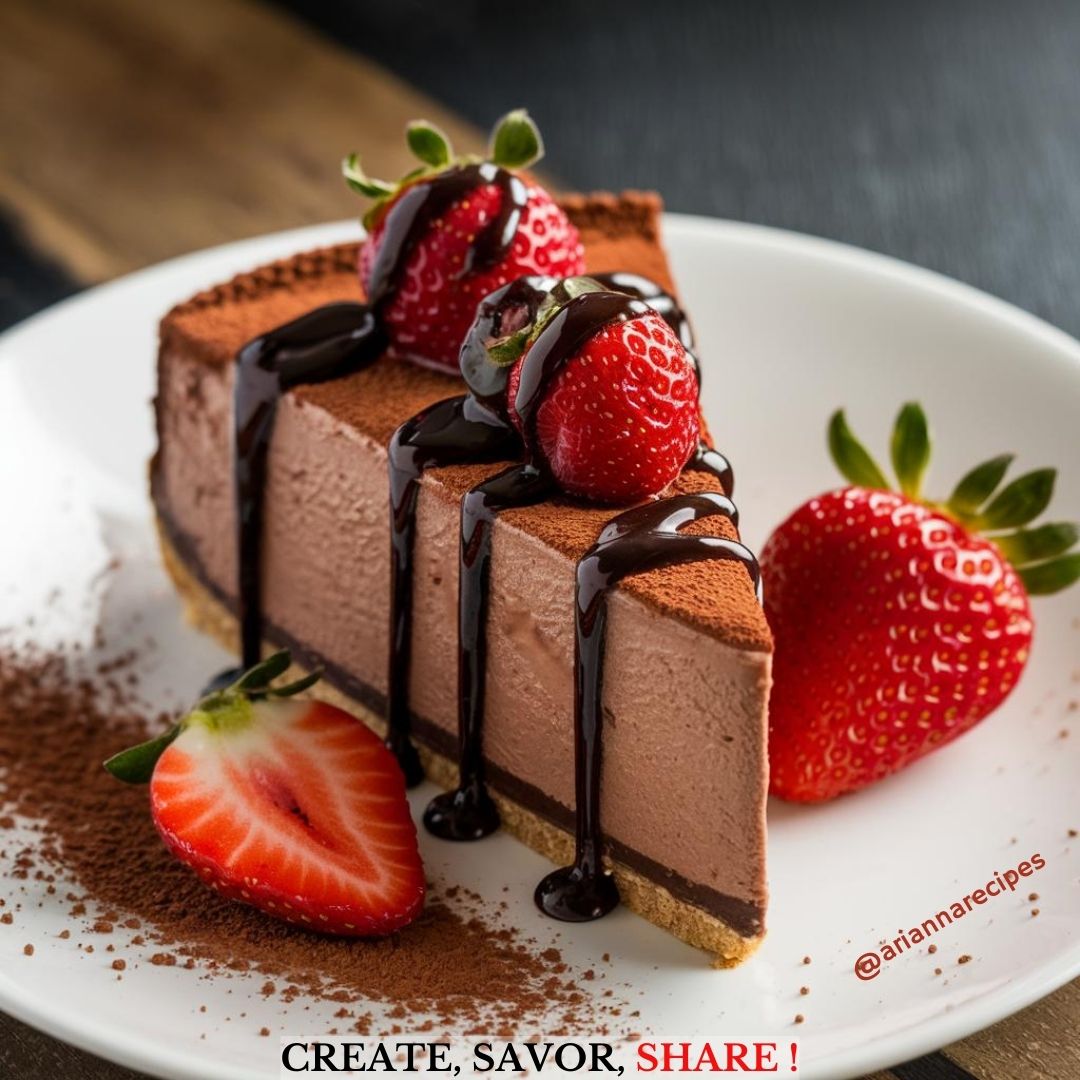
Creamy Chocolate Cheesecake 🍫🥄
Introduction: The Ultimate Dessert for Chocolate Lovers
When you think of decadent desserts, cheesecake likely ranks high on the list. Rich, creamy, and indulgent, it’s the kind of treat that instantly makes you feel like you’re experiencing a special occasion, even if it’s just a Tuesday night at home. Now, imagine taking that already indulgent experience and pairing it with the luscious depth of chocolate. Enter: Creamy Chocolate Cheesecake.
This cheesecake combines the tangy, smooth texture of traditional cheesecake with the bold, rich flavors of chocolate. Perfect for celebrations,

potlucks, or just a night in, this cheesecake is a showstopper that’s sure to impress. Whether you’re a seasoned baker or someone who’s trying their hand at cheesecake for the first time, this step-by-step guide will ensure that your **Creamy Chocolate Cheesecake** turns out perfect every single time.
What Makes This Recipe Special?
Before we dive into the recipe, let’s talk about what makes this particular cheesecake so spectacular.
Texture is the star of the show here. Cheesecake is known for its creamy consistency, but when you add chocolate to the mix, it transforms into a dessert that’s not only velvety but also has a slightly dense, fudgy texture. This recipe strikes the perfect balance—light enough to melt in your mouth but rich enough to feel like an indulgent treat.
The addition of high-quality cocoa and melted chocolate gives the cheesecake a luxurious, deep flavor that satisfies even the most insatiable chocolate cravings. And of course, let’s not forget the chocolate cookie crust, which provides the perfect crunchy contrast to the soft, creamy filling.
Ingredients Breakdown: What You’ll Need
To make this masterpiece, you don’t need a mile-long list of ingredients. Most of these items are pantry staples or easily found at your local grocery store. Here’s what you’ll need:
For the Crust:
– 1 ½ cups chocolate cookie crumbs 🍪
– ⅓ cup melted butter 🧈
– 1 tablespoon sugar
For the Filling:
– 3 (8-ounce) packages cream cheese, softened 🧀
– 1 cup granulated sugar
– 1 teaspoon vanilla extract 🌿
– 4 large eggs 🥚
– 8 ounces semisweet chocolate, melted 🍫
– 2 tablespoons unsweetened cocoa powder
For the Topping (Optional but highly recommended!):
– Whipped cream
– Chocolate shavings
– Fresh berries 🍓
Step-by-Step Instructions: How to Make Creamy Chocolate Cheesecake
This cheesecake comes together in a few simple steps, but the magic happens in the details. Let’s walk through the process to ensure your cheesecake is a success.
1. Prepare the Crust
Start by making the chocolate cookie crust. Combine the **chocolate cookie crumbs**, **melted butter**, and **sugar** in a medium-sized bowl. Stir until the mixture is well combined and has the texture of damp sand. Press this mixture into the bottom of a springform pan, making sure to press it firmly and evenly across the base.
Baking Tip: Use the bottom of a glass or a measuring cup to really pack the crumbs down for a firm, even crust. This helps prevent the crust from crumbling when you cut into the cheesecake later.
Once the crust is pressed into the pan, place it in a preheated oven at 350°F (175°C) and bake for 8–10 minutes. Remove from the oven and let it cool while you prepare the filling.
2. Make the Creamy Filling
The filling is where the magic happens. Start by beating the softened **cream cheese** in a large bowl until it’s smooth and creamy. Add the **sugar** and **vanilla extract**, and continue to beat until everything is well combined. The goal here is to create a smooth base without any lumps of cream cheese.
Next, add the eggs, one at a time. This ensures the eggs incorporate smoothly without overmixing. Overmixing can add too much air to the batter, leading to cracks in your cheesecake. Mix just until each egg is incorporated.
Now it’s time to bring in the chocolate! Gently fold in the **melted semisweet chocolate** and **unsweetened cocoa powder**. These two ingredients work together to give the cheesecake a deep, rich chocolate flavor.
3. Bake the Cheesecake
Pour the chocolate cheesecake filling over the cooled crust. Smooth the top with a spatula to ensure an even surface.
Place the springform pan on a baking sheet and bake at 325°F (163°C) for 55–60 minutes. You’ll know the cheesecake is done when the edges are set, but the center still has a slight jiggle. The residual heat will continue to cook the cheesecake after it’s out of the oven, ensuring a creamy texture without overbaking.
Baking Tip: To prevent cracks, place a shallow pan of water on the bottom rack of the oven while baking. The steam from the water will keep the cheesecake moist and help it bake more evenly.
Once the cheesecake is done, turn off the oven and leave the door slightly ajar. Let the cheesecake cool in the oven for 1 hour before removing it to finish cooling at room temperature. This slow cooling process prevents the cheesecake from cracking as it cools.
4. Chill & Serve
Once the cheesecake has cooled to room temperature, cover it with plastic wrap and refrigerate for at least 4 hours, or overnight for best results. Chilling the cheesecake allows the flavors to meld together and the texture to firm up to that perfect creamy consistency.
When you’re ready to serve, feel free to get creative with toppings. A dollop of whipped cream, a sprinkle of chocolate shavings, or even a handful of fresh berries can take this already-delicious dessert to the next level.
Expert Tips for the Perfect Chocolate Cheesecake
– Use room temperature ingredients.** Cold cream cheese can lead to a lumpy batter, so be sure to let your ingredients come to room temperature before mixing.
– Don’t overbake. It’s tempting to bake the cheesecake until it looks completely set, but you want to remove it from the oven while the center still has a little jiggle. This ensures that your cheesecake will be creamy and not dry.
– Let it chill. Cheesecake needs time to set in the fridge, so be patient! Giving it a full 4 hours (or overnight) will result in the best texture.
Variations to Try
Looking to mix things up? Here are a few creative twists on the classic **Creamy Chocolate Cheesecake**:
– Chocolate Peanut Butter Cheesecake: Add a swirl of creamy peanut butter into the filling before baking for a sweet-salty twist.
– Mocha Cheesecake: Mix in a tablespoon of instant espresso powder to the filling for a rich mocha flavor.
– Triple Chocolate Cheesecake: For the ultimate chocolate lover, use a combination of semisweet, milk, and dark chocolate in the filling. Top with chocolate ganache for an extra dose of chocolatey goodness.
Why Chocolate Cheesecake is Perfect for Any Occasion
Chocolate cheesecake isn’t just a dessert—it’s an experience. Whether you’re serving it at a family gathering, bringing it to a potluck, or simply treating yourself at home, this dessert has a way of turning any moment into a celebration.
What makes this cheesecake stand out is its versatility. You can dress it up with a fancy garnish for an elegant dinner party, or keep it simple for a cozy night in. The creamy, chocolatey goodness is universally loved, making it a crowd-pleaser at any event.
In addition, cheesecake keeps well in the fridge for several days, so it’s the perfect make-ahead dessert for a stress-free party. You can even freeze individual slices to enjoy whenever the craving strikes!
Nutrition Facts & Serving Information
While it’s hard to call cheesecake a “health food,” it’s definitely worth indulging in every now and then. Here’s the approximate nutritional breakdown per slice (based on a 12-slice cheesecake):
– Calories: 450 kcal
– Fat: 33 g
– Saturated Fat: 19 g
– Carbohydrates: 32 g
– Protein: 7 g
– Sugar: 25 g
Keep in mind, these values can vary based on specific ingredients and portion sizes.
Final Thoughts: A Chocolate Dream Come True
There you have it—your guide to making the most indulgent **Creamy Chocolate Cheesecake**. Whether you’re a fan of classic cheesecakes or looking to elevate your dessert game, this recipe is guaranteed to hit the spot. With a rich, creamy filling, a crunchy chocolate crust, and endless options for customization, it’s the kind of dessert that never disappoints. So go ahead—grab your ingredients, roll up your sleeves, and treat yourself to
a slice of chocolate heaven. 🍫🍰

